Home Blog Page 408

Review: Heroes Struggle on Destiny Beach in DOOM PATROL WEIGHT OF THE WORLDS #4

Monkeys Fighting Robots

The Doom Patrol finds trouble at Destiny Beach!

The Doom Patrol has been making a name for themselves amongst the stars. After being reunited by Crazy Jane, the team has been going planet to planet helping who they can. They recently had a detour as they found themselves trapped in the mind of Mento, but they are soon able to recruit him. Along with that, the team has been getting upgrades to their powers, such as Negative Man becoming positive and Robot Man getting a new body. What new adventure could the world’s strangest heroes stumble upon next?

Doom Patrol WotW 4 cover

**Some Spoilers Below**

Story:

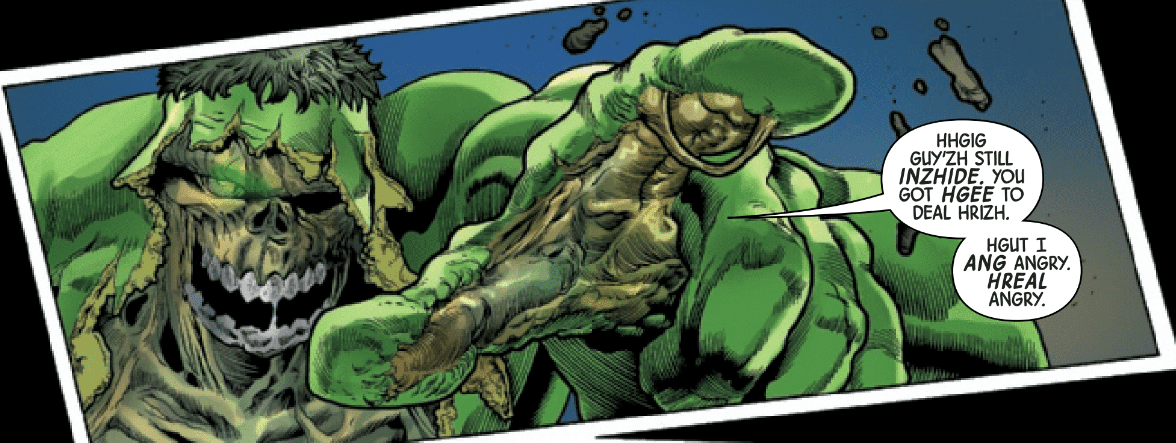
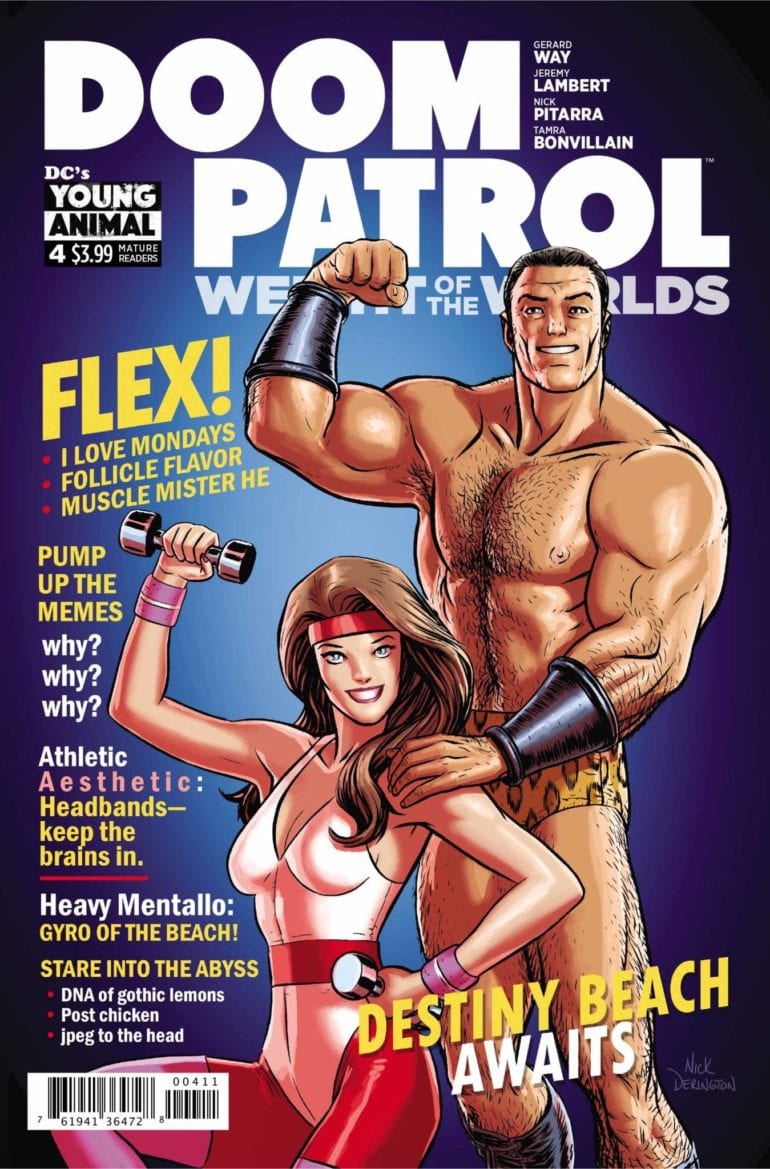
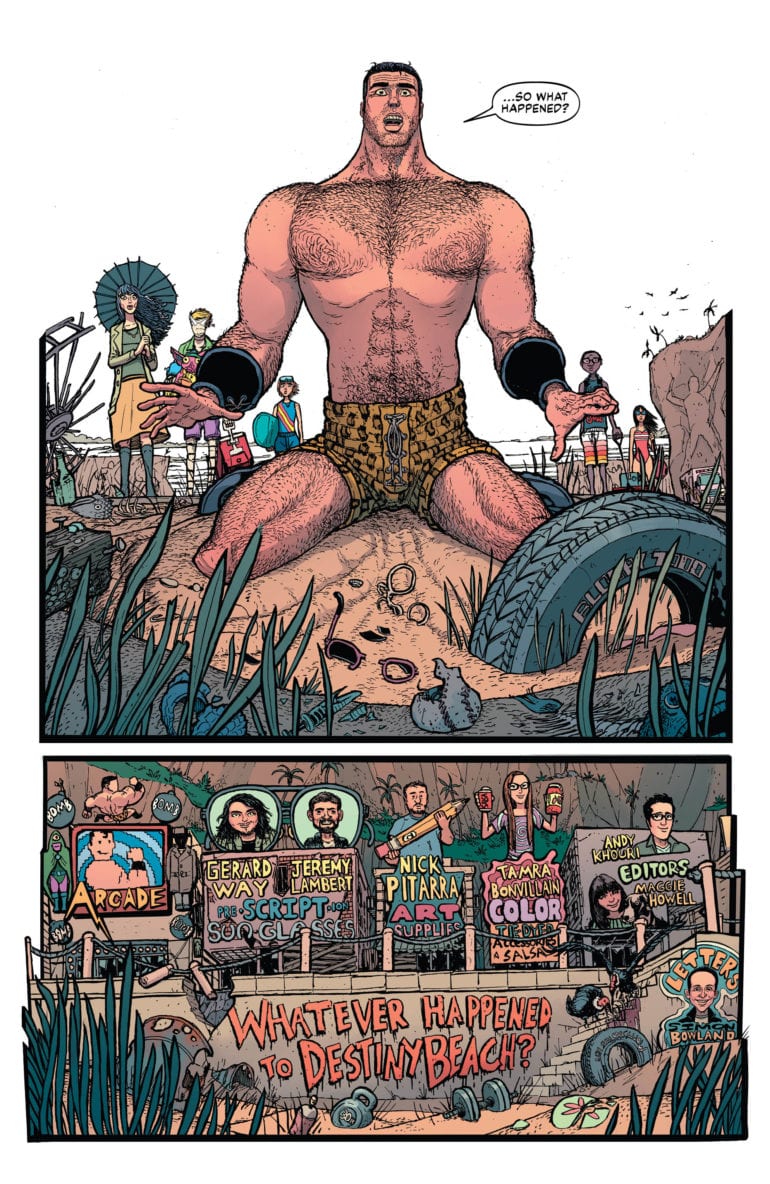
We open with an explanation of what the mythical Destiny Beach is. It is where several bodybuilders go to get the same powers as Flex Mentallo. It is the ultimate paradise to get in shape, which is why it’s shocking when the Doom Patrol arrives to find the beach trashed.

It’s revealed that another group of bodybuilders has taken over, with their leader wearing a powerful symbiotic set of trunks. To save the beach, Flex challenges the villainous muscle heads to a flex-off with members of his old workout group. Meanwhile, Cliff has been working to help the people of the universe in any way he can. Every time he does a good deed, his robotic body instantly upgrades, giving him the incentive to keep going.

Doom Patrol WotW 4 p1

This continues to be a strange book with one-off adventures instead of there being one big overarching story. On the one hand, it caters to the people who really enjoy the bizarre nature of the book. These solo adventures also help with character growth, with everyone evolving into new versions of themselves.

The downside of this style of storytelling is the fact it makes the series feel disjointed. I complete forgot Destiny Beach was a thing as it wasn’t mentioned since issue one and we never mentioned it in issues two or three. Add that to the fact the only connection to the past issues is the side story with Cliff, it just feels out of place. In the previous series, things were random, but they still all connected. Maybe it will in the end, but for now, Doom Patrol just feels lost.

Doom Patrol WotW 4 p2

Art:

For this issue, we have Nick Pitarra doing the art, and he honestly does a great job with the issue. He was able to match the overall cartoonish style of the new iteration of the Doom Patrol as a whole, but still go above and beyond with his own designs. The people of Destiny Beach look great, albeit comical with the number of muscles they flex for the final showdown.

Another great part of the art is Tamra Bonvillain’s colorwork. While previous issues have been more vibrant to have the characters pop, she actually keeps it more grounded. This style definitely had me hooked to keep my investment in the story. There were vibrant scenes as well, but those were contained to the places that were certainly in better shape, such as Dannyland. Overall, Bonvillain works well with Pitarra and makes this issue really stand out.

Doom Patrol WotW 4 p 3

Conclusion:

This issue of Doom Patrol is as strange as the rest of the series, but these one-off adventures are starting to show cracks. While I enjoyed the Destiny Beach adventure and the final flex off, it feels rather pointless as it isn’t connected to the other adventures. The art team has done an excellent job with this issue with beautiful designs and colorwork, especially during the final flex-off. While it was an okay issue, the series needs to find an overarching story to tell or risk losing focus from readers.

Monkeys Fighting Robots Youtube

Review: NO ONE LEFT TO FIGHT #4 – A Thunderous Rebirth, And Finally Someone To Fight

Monkeys Fighting Robots

No One Left To Fight #4 is probably the first solid entry in Aubrey Sitterson and Fico Ossio’s short miniseries. This certainly is not a slight considering every previous chapter in this story has been sensational, but No One Left To Fight #4 finally introduces the climactic first and final enemy, and I can’t help but feel slightly disappointed. This will surely prove divisive for fans of the series, but Writer Aubrey Sitterson, Artist and Colorist Ossio, fellow colorist Raciel Avila, and Letterer Taylor Esposito have certainly done enough in No One Left To Fight to assure readers that every character or plot point has its purpose.

No One Left To Fight #4 began like any other No One Left To Fight chapter. Vâle, Timór, Krysta, and Pod are on a mission to find their old comrades Quon and Kaya who now live a simpler, less conflict involving, more natural life. One aspect of No One Left To Fight that Sitterson has succeeded tremendously in is his sense of world-building. Since the beginning, Sitterson has dropped the reader in this world where the main story has already been finished. All of the heroes have fulfilled an arc, and all of the villains have been seemingly vanquished. Despite this, the reader never feels left out or like their lacking information.

Sitterson never beats the reader over the head with narration or uncharacteristic monologues; instead, he opts for his characters to speak naturally. At first, we don’t know the reason why Quon and Kaya chose to separate from society and become peaceful natured hermits. But through their dialogue with each other and our heroes, we learn that Kaya and Quon may have done some unbecoming deeds in the past. But this information is allowed to unfold naturally, so the true gut punch when the Hierophant is introduced is a quick aside, but it hits hard.

The climax of this chapter will draw a line amongst the fans of this story, though. A large part of this story has been the lingering threat of The Hierophant coming back for Vâle. While Sitterson has never explicitly questioned whether the Hierophant was real or not, I feel that there were previous hints of it in the story. For instance, No one has seen the re-emergence of the Hierophant besides Vâle; his feelings of anxiety spurned this entire tale. Then when the Hierophant appeared to Vâle in the previous chapter following Vale’s emotional discussion with Winda, no one else noticed the lightning and thunder that seem to follow the Hierophant’s entrance, but they all heard Winda chewing out Vâle? Couple this with Vâle’s consistent hallucinations/time displacement dilemma, it is easy to theorize that Vâle is merely unwell.

Instead, the Hierophant appears in the flesh to everyone. There is certainly enough time for Sitterson to use this as another tool to further his Shonen-type deconstruction intelligently, but certain fans will be disappointed.

Another Old Friend, Another Person Timór Doesn't Get Along With
Another Old Friend, Another Person Timór Doesn’t Get Along With

Fico Ossio and Raciel Avila’s art and colors are almost beyond reproach in this chapter. Ossio and Avila are just as deft at depicting a truly serene and peaceful scene in which Vâle has found true happiness fishing as they are depicting total mayhem and destruction such as when the Hierophant appears. Bruton’s dramatic rebirth is like an 80’s death metal album cover designed by a 14-year-old and simply put, it rules. The electric blue lighting crackles off the page, and Bruton’s character design is impeccable. Think a neon-green Doomsday with goat horns and a Luchador mask, yeah… pretty badass. The teaser image for the final issue is even better, and I want it on a poster. Taylor Esposito’s letters at the top of the image are perfect and remind of an announcer introducing a new wrestler into the ring.

No One Left To Fight #4 is further proof that Aubrey Sitterson and Fico Ossio’s creation should not be ignored. While the appearance of the Hierophant may divide the fan base slightly, there is no fear that Sitterson won’t make the result feel earned. Taylor Esposito’s letters and Raciel Avila’s additions to Fico Ossio’s colors are noted and welcome. It is hard to imagine any other creative team taking on No One Left To Fight.

Monkeys Fighting Robots Youtube

Review: The Bat is Back in Town in BATMAN #80

Monkeys Fighting Robots

The Battle for Gotham begins in Batman #80, hitting shelves this week from DC Comics. All things considered, the stakes couldn’t be much higher.

Batman and Catwoman begin their fight on the streets, working their way through the rogues’ gallery gauntlet. Meanwhile Gotham Girl, seemingly deprived of the Venom shipment interrupted by BatCat in our last issue, is near-death. And for that, Thomas Wayne swears revenge.

Batman #80

The Writing

Tom King’s writing in Batman #80 is compelling and well-paced. The dialogue is relatively sparse, allowing action to drive the story through most of the book. When dialogue is present, though, King doesn’t waste many words. It’s purposeful and targeted to achieve the greatest effect.

This issue indulges the reader in some pretty straightforward street brawling. The villains, one by one, come to the horrifying realization that Batman is back in Gotham, and he’s on the warpath. It’s fun, and it offers a bit of catharsis after seeing Bruce on the back foot for the last several issues.

All that considered, Batman #80 is not without flaws. Namely, the gamble Bruce makes at the book’s end stretches the limits of plausibility. It’s a great twist that heightens the drama and hooks the reader, ensuring we come back to discover what happens in the next issue. It’s difficult to imagine Bruce making such a wager, though, and it feels like something he would never do. It’s out of character, and it reflects poorly on his persona in general, spoiling an otherwise stellar work.

The book has a lot going for it all things considered, reckless endangerment aside. It’s another solid chapter in King’s culminating storyline.

Batman #80

Batman #80

The Artwork

The legendary John Romita Jr. and Klaus Janson team up to provide artwork for Batman #80. The pair takes a conventional approach, dividing each page into neatly-gridded panels. While not the most dynamic layout, it lends the book a sense of symmetry, tying everything together nicely. It’s rather meat-and-potatoes, but it’s done oh, so well.

Romita Jr. has an eye for creating dramatic illustrations. He skillfully uses repetition with subtle change in perspective or proximity to the subject to make the work feel cohesive while heightening tension. The images flow fluidly, with each still leaving a unique impression. For his part, Janson provides impressive work, making the book feel crisp, while also having a bit of grit to it.

Excellent though the pencils and inks may be, colorist Tomeu Morey doesn’t allow his peers to upstage him. Batman #80 is packed with rainy streets at night, and the setting allows Morey to showcase some beautifully stylish and expressive work. The artist highlights many of the pages in outlandish accent colors, giving it a vaguely neo-noir vibe.

Batman #80

Final Thoughts

Aside from troubling issues with Batman’s characterization, Batman #80 is a home run. It’s worth looking past the problems for the compelling storytelling and gorgeous artwork.

Monkeys Fighting Robots Youtube

RUNAWAYS #25: Who Is Doc Justice?

Monkeys Fighting Robots

Sometimes even the heroes need heroes, a fact which we’re firmly reminded of in RUNAWAYS #25. Coming out this Wednesday from Marvel Comics, this issue will have all fans asking; who the heck is Doc Justice?

Who is this mysterious Doc Justice?

***SPOILER WARNING***

Long have the Runaways been living up to their names. They have no permanent home, no family outside of each other. And frequently it feels like they’re still searching for a purpose. All of these emotions – and then some – are the focus of Runaways #25.

All Runaways fans know that our young heroes can’t maintain a good thing. Once it actually seems to be going their way, something is bound to come up and force another dramatic change in their lives. It’s a cycle that they cannot run from. And it’s this fact that keeps them unbalanced and continually facing the risk of tragedy.

So, with that in mind, we knew that a change had to be looming on the horizon. The last few issues have been building up to it a bit, with Nico and Karolina seeking new purposes in their lives. But Runaways #25 takes that pressure to a whole new and explosive level.

The farther we get from the day this photo was taken, the sadder it becomes.

Rainbow Rowell somehow managed to weave so much into this single issue – it takes a little bit to sort through it all. Several major plots are running through it, of course. But then there are some smaller – but still noteworthy – moments as well.

First in many fans minds will likely be; who the heck is Doc Justice? And what’s the catch? Because it seems pretty odd that none of us have heard of him. One would think that a legit hero would run across any of the other Marvel heroes at some point before now. The foreshadowing with this guy is so thick it’s almost impossible to see through.

Second. Um, Chase’s tattoo? What. It’s hard to decide how to feel about this one. Amused? Broken-hearted? Concerned? All of the above? And that is one of the smaller elements of this issue, just to give you an idea of what is to be found inside these pages.

Another concerning moment surrounds Nico and the foreshadowing. This is something that eagle-eyed fans have been concerned about ever since Nico made her deal. In a way, it’s good to see that this subplot hasn’t been dropped. But it’s also extremely concerning to see that something is lurking just out of sight – something that Nico is continually ignoring.

Enter Doc Justice! But who is he?

The artistic team did an excellent job of handling the multiple plots and a variety of emotions expressed in Runaways #25. While the main focus was undoubtedly on the elephants in the room, the artwork also allowed for a decent amount of subtlety, folding in secondary stories (like the one mentioned above) without a single word needing to be said.

Andres Genolet was the lead artist for this issue, and we love the amount of personality and emotions they were able to push into our beloved Runaways characters. Meanwhile, Federico Blee and Matthew Wilson were the colorists for this issue. Their work felt delightfully familiar to the rest of the series, while also having a bit of fun here and there.

VC’s Joe Caramagna was the letterer for this issue, and his final touches made the story. There were several iconic moments and panels in Runaways #25 that were made larger than life thanks to the lettering involved.

We might not know much about the man, but clearly he can fight.

Runaways #25 was an issue designed to force change, while also building up to something more. In that sense, it was the perfect Runaways plot. And you know the story has only just begun.

Monkeys Fighting Robots Youtube

Review: COPRA #1 Brings Michel Fiffe’s Cult Comic To Image And It’s Great

Monkeys Fighting Robots

Image Comics brings Michel Fiffe’s excellent indie superhero comic Copra under its banner with a debut issue that is a treat for longtime fans and an excellent jumping in point for new ones.

From Image- COPRA returns in the first issue of its all-new ONGOING SERIES! Acclaimed comics auteur MICHEL FIFFE picks up where his band of mercenary misfits left off, reintroducing the entire cast of his Suicide Squad-esque revenge machine in a brutal standoff against their own leader. Jump right into the thick of it with the world’s greatest action team in this extra-length debut milestone.Copra

Copra #1
Written, Drawn, Inked, Colored, Lettered and Produced by: Michel Fiffe

Copra #1 opens with a few quiet and catch up pages. Fiffe drops us in on his Suicide Squad analog as they take a moment to rest after their last mission (Copra: Round Five). Using roll call techniques and just a little bit of exposition, Fiffe quickly gives new readers all they need to know (who the team is and why they are in Miami) before the shit hits the fan and we get a full-on classic Copra action scene. And what an action scene it is. We get robots, guns, super-powered fistfights and martial arts moments. Fiffe excels at writing and drawing a kinetic scene. Flipping through the pages is exciting, and the images feel like they are moving and popping off the page.

Copra
Roll call!!!!!!

His understanding of the comics medium is obvious. He pulls influences from all sorts of places: manga, indie comix, Steve Ditko, 80s outlaw comics, 90s Image and much much more. One of the best aspects of reading and looking at issues of Copra is figuring out where the comic book influences come from and how Fiffe tweaks them and pushes them to make them unique, bizarre and totally his own. His art also feels HAND-DRAWN and so immediate you feel like Fiffe is drawing right in front of you. Copra is the best kind of homage; filled with love, knowledge of the medium and originality. It’s a fucking pure pleasure to read if you are a comics fan.

Copra
Excellent use of layout and composition!

The story itself may be a take on Suicide Squad, but the weirdo backstories and strange characters give it a very offbeat tone that at times adds some surrealism to the story and makes the characters such outsiders that you can’t help but fall in line and root for them.

Copra
Just look at this crazy goodness!!!!

If you really dig comics, then Copra is a must buy. Grab this issue, buy the previous collections and jump right in. Fiffe is one of our best current comics artists/cartoonists and this is the kind of thing only this medium we all love can pull off.


You can pick up Copra and any and all comics at your local comic shop.


Monkeys Fighting Robots Youtube

The Tale Continues in STAR WARS ADVENTURES: RETURN TO VADER’S CASTLE #1

Monkeys Fighting Robots

The tale of Vader’s castle continues in STAR WARS ADVENTURES: RETURN TO VADER’S CASTLE #1. Coming out this Wednesday from IDW, the all-new series will bring with it a new set of adventures – and dangers surrounding some of our favorite antagonists in the universe.

Well, that’s certainly an attention-grabbing cover!

***SPOILER WARNING***

Fans will likely remember the first round of Star Wars Adventures: Vader’s Castle. It didn’t exactly go well for explorers or antagonists alike, leaving us to assume that things will go just as dreadfully this time around as well.

While the first series was set almost entirely on Mustafar, the sequel series, Return to Vader’s Castle seems to be interested in branching out a bit. Yes, everything will inevitably lead us back to Mustafar in the end. But it doesn’t all have to start there, now does it?

And so the story begins, once again on Mustafar.

The entire run of Star Wars Adventures reads almost like a series of campfire tales. They’re dark and dangerous and designed to leave children feeling a little bit chilled to their bones. But it’s all meant in good fun, and Return to Vader’s Castle perfectly fits that structure.

There are several disturbing and heart-stopping moments within these pages, but there are also plenty of thrilling moments to balance things out. Fans of certain antagonists will be especially excited to see their appearance here – as it’ll explain just a little bit more about their survival and their time spent between movies.

You heard the man! It’s time for this story to begin.

Cavan Scott was the author behind this issue, and you can tell this is a tale they’ve been working on for quite some time. You can also tell which characters they grew up being fond and curious about – if the focus and direction of this series is anything to go by.

Return to Vader’s Castle #1 is told through several jumps in time. These jumps were designed to obfuscate the truth while building tension. And it works. Readers will know right away that there’s something seriously wrong going on, but it’ll take a few pages for the truth to be fully revealed.

This big reveal was dramatic, to put it mildly. Any sith fans out there are going to have trouble holding back their reactions while reading this issue. Let’s be honest here. Most people that are chomping at the bit to read a series titled ‘Return to Vader’s Castle‘ are likely to be fans, or at least curious, about the darker side of Star Wars.

This issue does leave us off with more questions than answers, and in the comic book world that is excellent. It’s how they ensure that we come back next month. And there is more to this thrilling tale than meets the eye.

Nothing quite like getting forcibly ejected from a ship mid-flight.

Star Wars Adventures: Return to Vader’s Castle #1 had a decently sized art team working to bring the story (and our antagonists) to life. But it was worth it. The result was a series full of brightly lit and colored panels. It may not be the sort of thing you’d expect from a dark tale, but it fits the general ‘campfire’ theme pretty well. And it really does leave a lasting impression.

The character designs were the highlight of this issue – though one or two are more notable than the rest. This fact will become immediately clear upon the major revelation. When that happens, be sure to take some time and absorb all the details about this character’s appearance.

Francesco Francavilla (artist and colorist), Megan Levens (artist), and Charlie Kirchoff (colorist) all worked on this issue together. Their style may not match the movies – but honestly, that may be for the best. They’ve made this tale their own, through and through.

And of course, we can’t forget the lettering for this issue, which was provided by Andworld Design. The lettering was intentionally unobtrusive, while also pulling some extra weight in the emoting department. It was the perfect final touch on this issue.

Think he’s lashing out because he’s scared?

Star Wars Adventures: Return to Vader’s Castle #1 was a curious introduction to a new series surrounding Vader and all of his many mysteries. There’s so much going on behind the scenes. After all, this is a Star Wars antagonist we’re talking about. The creative team has did a fantastic job of making the series both unique and memorable.

Monkeys Fighting Robots Youtube

Review: IMMORTAL HULK #24 – Behold, The World Breaker, HULKALACTUS!!!

Monkeys Fighting Robots

Bruce and the Hulks take care of business in Immortal Hulk #24, the most gruesomely horrific issue to date, out this week from Marvel.

The gloves are off, and these monsters have had about enough of each other.

Al Ewing writes this body horror masterpiece, while Joe Bennett creates some of the best Hulk panels I’ve ever seen. Bennett’s pencils on this issue require an army of inkers by the names Ruy Jose, Belardino Brabo, Marc Deering, and Roberto Poggi. Paul Mounts handles all the glowing gamma greens and hot melting flesh. VC’s Cory Petit has the honors of lettering these gruesome action sequences with emphasis on smashing. Petit uses transparent, rocky style lettering to get the emphasis across and without taking away from any of the artwork.

The fantastic body horror and transformations get better and more creative with each issue. It seems like the more Bennett gets to work on this book, the more gruesome his pencils get. Hulk has been chopped up, melted, ripped apart, and it looks beautifully disgusting every time. Immortal Hulk is what you’d get if you gave John Carpenter the reigns to a jade giant film. With transformations so horrifying you wonder why these characters hang around long enough to fight what he turns into. The Hulk is already scary enough; add some extra arms and a giant mouth, and I’d be running so fast I’d be passing Quicksilver on his way to save the X-Men from their burning mansion.

Galactus has had a big role in a few of the best Marvel books on the shelves right now. Silver Surfer: Black #4 provided more detail into his origin and how the surfer is involved. Immortal Hulk #24 tells us why Galactus came to be and gives a glimpse into the real power the Hulk has yet to unleash on the cosmos. Hulk has some enormous shoes to fill with that new role, but he seems more than capable of handling it.

If you’re a fan or collector of Galactus, then this is another issue that is crucial to your collection. This series, along with Silver Surfer: Black, are expanding on the extensive history of the Marvel Universe, so this is also for the history buffs. Al Ewing is reaching deep down and pulling some of the most obscure and forgotten Marvel properties out of his hat. Immortal Hulk #24 is no exception as an often forgotten mutant makes an appearance at the end of all things. You never know what $1 book Ewing might turn into a $50 back issue.

Immortal Hulk #24 is one of the best entries into the body horror genre there has ever been or will ever be. The designs are top-notch, and every horror fan will love the art in this issue, even if they aren’t fans of Marvel or the Hulk. This is A++ body horror, and I’m surprised every month that it comes from a Disney company.

One of the most horrifying aspects of the Hulk that I think most people take for granted are the multiple personalities. He is being pulled in so many directions at the same time that the only realistic response is rage. Now that the personalities are all in agreement, and focusing the unbridled rage, the Hulk is unstoppable, and he knows it.

No one can stop him. No one can contain him except himself. The breaker of worlds is hungry. He’s always hungry.

What did you think of Immortal Hulk #24? Are you excited to see Hulk kill the Marvel Universe in canon? Let us know in the comments below.

Monkeys Fighting Robots Youtube

Review: Hal Jordan Fights His Evil Counterpart in THE GREEN LANTERN #12

Monkeys Fighting Robots

The story arc that began as a refocusing endeavor on Hal Jordan’s life culminates with a climatic battle between the Green Lantern and his anti-self: the Qwa-Man. This being from the anti-matter universe is literally the antithesis to Hal, and he’s hellbent on destroying the rest of the multiverse. Joined by a relatively small team of Lanterns, our hero leads the final charge against this seemingly unstoppable force in THE GREEN LANTERN #12, available in stores Wednesday, October 2nd.

The Green Lanterns take on the Qwa-Man in the No-Zone

Story

Sometimes the most unexpected things happen when one’s least expecting it—in Hal’s case, this saying may as well have hit him in the face. Just as he was about to be defeated by the Qwa-Man, a yellow light guided by the villain Sinestro enveloped the fiend and tossed him aside. Confused and disoriented, Hal wonders why one of his worst enemies would save his life, soon realizing that this version of Sinestro is the opposite/good counterpart of the villain from his own universe.

But this “good” version of Sinestro isn’t all he’s cracked up to be. In fact, the Yellow Lantern reveals he was paid to release the Qwa-Man upon the positive matter universe. Fortunately, the being behind it all—the one who generated all of this anti-matter chaos in Hal’s world—is revealed within the concluding pages of the story.

With this being the last issue of Grant Morrison’s current run in the series, it makes sense that he and his team would spend time a large portion of the story tying up loose ends. Some authors do this in rushed or forceful way, but Morrison ties them up like a bow. Readers get to see characters they might have forgotten about arrive on the scene to play their part, and the highly anticipated battle with the Qwa-Man does not disappoint. We find questions answered and many more posed to us as the creative team brings this saga to its thrilling conclusion.

Artwork

The artwork within this edition of THE GREEN LANTERN is amazing as always; just when you think Liam Sharp’s penciling and Steve Oliff’s coloring could get any better, they find a way to continually astound readers. The chaos of the Qwa-Man and the anti-matter forces alongside him seem to warp the fabric of spacetime around the Lanterns, seemingly extinguishing their green light. What’s more, Tom Orzechowski’s dialogue boxes seem to be affected as well, transforming into various asymmetrical shapes as if being pulled every which way by the anti-matter.

Comic Covers

Main Cover

Sharp and Romulo Fajardo Jr.’s main cover art features Hal and Qwa-Man, locked in an intense battle. We also see an image of Controller Mu serving as a backdrop, representing his ongoing influence in the Lantern’s life.

Variant Cover

Riley Rossmo’s variant cover depicts a rotting, zombified version of Hal, which serves as a creative fusion of the hero and his anti-matter counterpart.

Conclusion

THE GREEN LANTERN #12 concludes this story arc in the best way possible, offering a satisfying confusion while opening up the narrative into an exciting new direction.

What did you think of Hal’s confrontation with the Qwa-Man? Let us know in the comments below!

Monkeys Fighting Robots Youtube

Review: Helene Fuels Her Revenge In DUNGEONS & DRAGONS: A DARKENED WISH #3

Monkeys Fighting Robots

Fans of the Forgotten Realms comic book adaptation will once again join their favorite lively party of adventurers as they explore the region’s secrets. But spirits aren’t as high as usual; the mad dragon Hoondarrh has laid waste to countless armies, and Helene, the group’s de facto leader, is severely wounded. Can Solivigant, Rayonde, and the rest of the team save her? Will Hoondarrh continue on his path of destruction? Find out when DUNGEONS & Dragons: A DARKENED WISH #3 hits stores Wednesday, October 2nd.

Story

The story begins with Solivigant narrowly escaping the recent battle against Hoondarrh in Mintarn of the Moonshae Isles, with an unconscious Helene in tow. The situation looks bleak, but the Kenku won’t give up on his friend that easily. He performs a magical elvish ritual to bring her back from the brink of death, leaving the young wizard with one thing on her mind: revenge.

Solivigant heals Helene

Writer B. Dave Walters gives readers an authentic look at relationship between revenge and regret in Helene’s actions throughout the story. We feel her rage at Hoondarrh for destroying her family, joining in her desire to make the dragon suffer as she did. But we also follow down the almost inevitable trail of regret she experiences as her retribution ends up hurting one of her closest allies.

Artwork

Tess Fowler’s penciling, Jay Fotos’ coloring work in harmony to offer readers stunning visuals. We’re treated to a mix of fantastical elements mixed with the horrific realities of war, most clearly depicted by Helene’s awesome magical abilities in the midst of a land laid waste by fire. The colors range from dull browns and varying shades of black, reflecting the charred remains, to brighter hues infused in the magical spells.

These scenes transition quickly, so the importance of lettering cannot be understated—Neil Uyetake places the letter boxes in each panels’ most open spaces to provide room for explanatory dialogue without taking the reader’s gaze away from the stunning illustrations.

Comic Covers

Cover A

Fowler and Tamra Bonvillain’s main cover artwork shows a mirrored image contrasting Hoondarrh with Rayonde, showing how two similar looking entities can be polar opposites on the inside.

Cover B

Fowler’s additional cover is once again a character sheet, as in the previous two issues. This issue focuses on Rayonde, as he is one of Helene’s closest allies.

Retailer Incentive Cover A

Ibrahem Swaid’s takes a different approach than Fowler’s covers by focusing on the dynamic duo that is Karrin and Kerrin. It’s a nice change, reminding readers of the other influential member of Helene’s party.

Retailer Incentive Cover B

The third variant cover features a black and white version of Fowler’s Cover A, offering up an alternate view of her astounding artwork.

Conclusion

DUNGEONS & DRAGONS: A DARKENED WISH #3 might be fast-paced, but it works itself out by moving the story forward. We’re anxious to see how Helene deals with the consequences of her vengeful actions.

What did you think of the startling turn of events in this issue? Let us know in the comments below!

Monkeys Fighting Robots Youtube

Win A Digital Copy Of TOY STORY 4

Monkeys Fighting Robots

Monkeys Fighting Robots, POPAXIOM, and Disney’s Pixar has teamed for a TOY STORY 4 giveaway!

Enter your chance to win a digital copy of Disney and Pixar’s TOY STORY 4!

The contest is straightforward to enter:
• Join our newsletter (Comic Review Digest)
• Comment on this post below.

***Bonus entry, share this contest on social media.

Good luck! Winners will be chosen at random on Tuesday, October 8, at 3 p.m. EST.

Step 1 – Join our newsletter

Comic Book Review Digest

* indicates required


View previous campaigns.


Step 2 – Comment on this contest below.

###


Win A Digital Copy Of TOY STORY 4
©2019 Disney/Pixar

Disney and Pixar’s Toy Story 4 Captures the Hearts of Fans Old & New 

Coming to Homes Digitally Oct. 1st and on Blu-rayä Oct. 8th

New on 4K UHD

Extras include all-new deleted scenes, conversations with the talent and filmmakers sharing the most memorable moments and characters and much more!  

BURBANK, Calif. (August 22, 2019) — This summer, Disney and Pixar’s “Toy Story 4” took audiences on a hilarious and heartwarming road trip with Woody, Buzz Lightyear and the whole gang, earning a 98 percent critics rating on Rotten Tomatoes and more than $1 billion at the global box office. Packed with old friends and new faces, the fourth film in the beloved Toy Story series, which leads Woody to an unexpected fork in the road, arrives home on Digital in 4K Ultra HD™, HD, and Movies Anywhere Oct. 1, and on 4K Ultra HD™, Blu-ray,™ DVD Oct. 8.

Fans who bring home “Toy Story 4” will be treated to over an hour of bonus features celebrating the film’s iconic characters, Pixar’s filmmaking team and the legacy of “Toy Story,” which began as the world’s first fully computer-animated feature film released nearly 25 years ago. Extensive extras includes deleted scenes such as an alternate ending, an all-new featurette with an endearing look back on Woody and Buzz’s legendary friendship throughout the years; entertaining studio stories shared by members of the Pixar team; a nostalgic look back at the creation and first storyboard screening of “Toy Story” with filmmakers; and the pioneering efforts of Pixar artists who created the sets, characters, look and feel of the original film and much more.

In “Toy Story 4,” Woody (voice of Tom Hanks) has always been confident about his place in the world, and that his priority is taking care of his kid, whether that’s Andy or Bonnie. So, when Bonnie’s beloved new craft-project-turned-toy Forky (voice of Tony Hale) calls himself “trash,” Woody decides to teach Forky how to embrace being a toy. But a road-trip adventure, including an unexpected reunion with his long-lost friend Bo Peep (voice of Annie Potts), shows Woody how big the world can be for a toy. In addition, carnival prizes Ducky (voice of Keegan-Michael Key) and Bunny (voice of Jordan Peele) bring a new level of fun to the film.

The must-own, fourth installment in the Toy Story series will be packaged several ways to ensure families get the most out of their in-home entertainment experience. “Toy Story 4” arrives home a week early on Digital 4K Ultra HD™, HD and SD with two exclusive extras including a deleted scene, “Bonnie’s Playtime”.  A physical copy of the film is available as a 4K Ultra HD™ Combo Pack (4K Ultra HD, Blu-ray, and Digital Code), a Multi-Screen Edition (Blu-ray, DVD and Digital Code) and a single DVD. Fans who wish to relive all four Toy Story adventures may opt for a Digital bundle, which is available for pre-order.

BONUS FEATURES (may vary by retailer)

            Blu-ray & Digital:

  • ‘Toy Stories – The Toy Story 4 cast and crew share their love of toys!
  • Woody & Buzz – Take a look at the relationship between these two legendary characters.
  • Bo Rebooted – Discover how Team Bo reimagined all aspects of Bo Peep’s identity to arrive at the fully realized character seen in the film.
  • Toy Box – Enjoy a collection of mini-docs on the film’s memorable new characters, featuring the voice actors, director Josh Cooley and Pixar artists talking about the many elements that make these characters fun and lovable
  • Let’s Ride With Ally Maki – Ally Maki, voice of Giggle McDimples, learns all about Pixar’s dialogue recording process from director Josh Cooley and his team.
  • Deleted Scenes introduced by director Josh Cooley including:

o   Scamming Playtime

o   Bo Knows Hippos

o   Desperate Toys

o   Knock-Offs

o   Recruit Duke

o   She’s The One

  • Audio Commentary, Trailers and more!

Digital Exclusive:

  • Anatomy of a Scene: Prologue – Filmmakers and crew review key scenes of the movie and dissect the practical and technological methods used to bring them to life.
  • Additional Deleted scene –  Bonnie’s Playtime

“Toy Story 4” Cast and Crew

“Toy Story 4” welcomes both veteran and new voices, including Tom Hanks as Woody, Tim Allen as Buzz Lightyear, Annie Potts as Bo Peep, Tony Hale as Forky, Keegan-Michael Key and Jordan Peele as Ducky and Bunny, Madeleine McGraw as Bonnie, Christina Hendricks as Gabby Gabby, Keanu Reeves as Duke Caboom, Ally Maki as Giggle McDimples and Joan Cusack as Jessie. The voice cast also includes Jay Hernandez, Lori Alan, Bonnie Hunt, Kristen Schaal, Emily Davis, Wallace Shawn, John Ratzenberger, Blake Clark, the late Don Rickles and Estelle Harris.

“Toy Story 4” is directed by Josh Cooley, and produced by Mark Nielsen and Jonas Rivera. Andrew Stanton, Lee Unkrich and Pete Docter are executive producers, and Stanton and Stephany Folsom wrote the screenplay. Longtime “Toy Story” collaborator Randy Newman composed the score and wrote two new original songs, “I Can’t Let You Throw Yourself Away,” performed by Newman, and “The Ballad of the Lonesome Cowboy,” which is performed by Chris Stapleton for the end credits.

Monkeys Fighting Robots Youtube